Showing posts with label before and after. Show all posts

Sunday, December 9, 2012

HUGE Christmas sale


Who couldn't be jolly this time of year?! Especially here in North Idaho right now. We just got a fresh batch of snow that is sticking around for awhile and it is soo beautiful! It really makes it seem like the Christmas season. Its been so long since Ive blogged I am about to throw out a whole lot of pics and info. Heres some of the winter fun we've been having:


Santa!! (So sweet, Emma told him she wanted a "jiggly" tooth brush(the electric one), so she is convinced, and fine with that is all she is getting for Christmas:) I love these young years, when they are still so easily made happy with  little toys and simple things)

A morning at Macies school. 

Helped my bestie decorate the church stage for the season

Its the holidays in here!!

Decorating up the house

Brandon took the girls into the woods in the back and let them pick out the tree this year:) and I then let them decorate it. It was soo hard for me when I'm so set in my ways about the decor, but I let go, and they LOVE it! Next year, I think we'll have two:) One for them and one for me:)

Brrr!!!


And last weekend I had the privilege to sell at a great annual show "Home for the Holidays". It was so fun! Here are some pictures of my booth and what I still have for sale. I've lowered prices as we get closer to Christmas, so contact me for questions!  
beamdesign4@gmail.com

One view of my booth
(Still for sale: "On Lake time" barnwood signs-$20
'Noel' and 'Peace' barnwood signs-$12
'Joy' blocks -$8
earrings and rings-$6.50
dishtowels-chevron and anchors-$5

Still for sale:
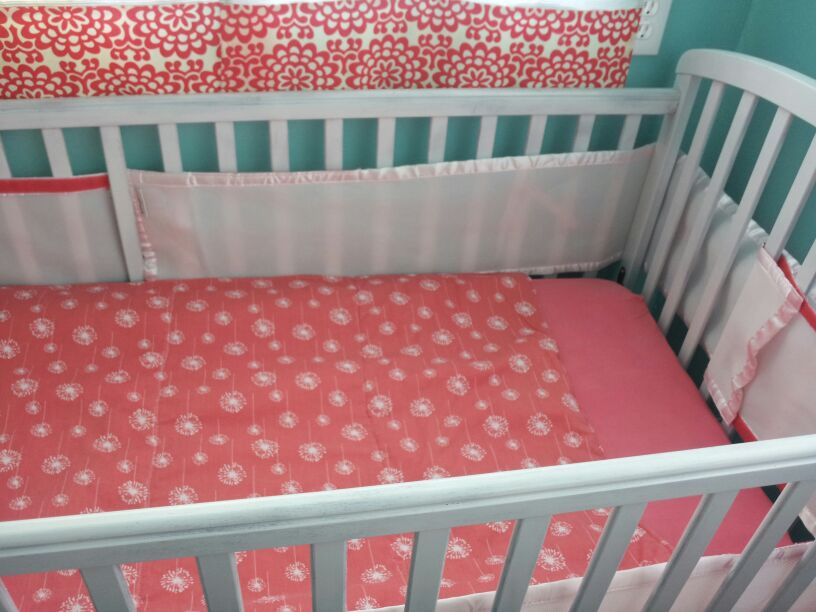
gray baby cradle from this post-$30
gray chair-$22

Still for sale: 
'home is where the anchor drops' sign-$20
"LOVE" sign-$15
"Let it snow' barnwood sign-$20
6' growth charts-$20
burlap stockings-$15

joy manger sign-$20

Grateful barnwood sign-$12

Growth charts in the back still for sale-$20
childrens vintage anchor chairs-$10 each
burlap stockings-$15
Let it snow sign-$20

$15


 6.50

$15

Buy local, peeps! Handmade love is the best kind of gift:)
Happy Holidays!!!!

Tuesday, October 23, 2012

Side Board redo

I got this piece on our local Facebook yardsale sight for $15 a few months back. I have always wanted some kind of sideboard piece for the kitchen or behind the couch, so Ive been waiting to this piece for our own home. Here she is before:

I painted her gray, distressed her, took off the existing handles and drilled new holes for these new beauties.
And after:


And all decorated up for fall:


Partying at:

Thursday, October 11, 2012

Vintage vanity redo


I found this old vanity and brought her home earlier in the summer. I loaded her up in the back of the truck by myself(kind of awkward) because I knew what would happen if I asked for help with this one. And I was right. When I got home, my dad told me to throw it back and my husband looked at me like I was crazy and walked straight into the house. But come on!! My nana, grandma and great aunt were all beauticians and I kind of love me an old vanity. Even sans the mirror, hardware and two drawers. And even despite the fact that it was filled with spiders, leaves and what looked like potting soil.

And then came the silliness of it all. Those drawers will ONLY fit in those two spots. There's no moving both to one side, or moving them both to the top or bottom. So, then again, my dad said to throw it back. But I didn't:) I think she is so cute painted white and distressed and with thee old heavy handles from the Hobs. I thought about either making a fabric cushioned pad on the middle section or making cute little curtains over the shelves I made. I have tried to sell it a few times and this piece has stuck around much longer than most. What do you think? Should I make a padded top, or some curtains?? 


AFTER:


Wednesday, October 10, 2012

A nursery makeover!


I redid my sister, Robins office into a nursery a few months back for sweet baby Mckinley(who is now 6 weeks old!)

 I keep meaning to go back and take better pictures, but never have, so I figured Id just do the post already:) I will come back and add more later when I can figure out how to get pics off my old phone. I have a few tutorials I took pictures for. 

Heres the room just getting started:
(We didnt get the crib before. It was your basic wood crib and we painted it white.)

And after:(Its hard to get a shot of the whole room cause its so long.
I painted this dresser coral and white. I still plan on putting a large black owl silouette on the front, but need to find a projector. I painted the two lamps Robin already had white and then recovered the shades with some cute teal polka dot fabric. The candlesticks were pink and I painted them aqua. Right now they act as book ends.


Theres no closet in this room, so Robin came up with a great idea to utilize the space. This was originally her husbands desk, so he added a bar along the bottom to hang the itty bitty clothes.

The crib we painted white. (5 cans of spray paint later!) The bumper is 
one of those new
 breathable  ones that we got in white and I tried to dye. Little did 
I realize that Polyester + dye = no go. I had even gotten onesies and practiced before getting the bumper .
Totally different fabrics:) The velcro worked and the rest is a baby pink, 
but it actually works. I didnt want it too matchy matchy anyway.
The crib sheet was white and I dyed it coral. The curtains are a 
white with gray pinstripes(better picture to come i promise!)
 And the quilt I made one side out of this adorable dandelion silouette 
and the other side out of a piece from every other fabric in the room.
The curtains are a white with gray pinstripe with this great Amy Butler fabric
 on the bottom. It said "cherry" as the color, but I just knew it would work! 
The curtains totally lightened up the room! The gray was on sale for 2.99 a yard! 
You cant beat that and I think the flowers for the whole thing would have been too busy.


Heres the comforter on one side


I made this mobile with circles of coordinating fabrics , coral ribbon and an embroidery hoop. I just love how it turned out!
The artwork I did also. It was so simple. I just stretched some fabric over an old canvas with my staple gun(on the back), and used my cricut to cut out different sizes and shapes of flowers(and painted some aqua).
The framed flower I made out of fabric, painted an old frame and attached it to some chevron paper I stamped. Sooo easy!
The 'M' is the same paper I stamped, cut out on my cricut and attached it with some baby clothes pins to a strip of lace.


Heres the two drawers I painted, distressed and lined. I originally was going to hang these on the wall as shelves, but ran out of wall space.
So I decided an under the crib storage worked just as well.
(And the other side of the comforter)


This owl I am very proud of:) I couldnt find a cricut cartridge with an owl that had any more images I would use much. So I finally just used the basic one I have and cut out all different shapes to put him together! Isnt he cute!!? I got all these frames at garage sales this summer and painted them all white.
The "you are loved always" was a quote on my sisters pinterest, and cut out with my cricut.
The little two are just scrapbook paper and stickers I already had(with the right colors!!!)
And the 'M' I cut out of some old mat board and covered in glitter. That was a mess:)

So there it is!! Mckinley is still sleeping in her mommy and daddys room, but I know she will enjoy this room soon and her mommy already is!

And one more picture because I cant help myself:

Partying at :


Sunday, October 7, 2012

I love Brits

These pictures don't do it justice. I love the dresser redo I finally did for my hubby! I know he loves the wood look, but I'm trying to lighten up our room. So I let him keep some distressed stripes of wood:) (and a whole other wood dresser I might add.) This is the first piece of furniture I have deemed male. His name will b Prince William:) Here he is:) before and after:

Partying at :
 
SITE DESIGN BY DESIGNER BLOGS